|
Birthday Princess Cake With FondantTake a look at my easy princess cake decorations ideas that make a cake unforgettableI wanted to try out a fondant birthday cake to have an opinion about this type of icing. I have to say that it makes the cake look wonderful and I can fully recommend it for a doll-type of cake. The skirt just looks much better when it is made of fondant then from icing.
I would not recommend doing them if you don’t have a turntable. My princess cake decorations were mostly pre-made flowers that I stuck to the fondant using some royal icing. Take a look at the detailed instructions below on how to make a princess cake.
How to make a princess cake using fondantWhen I made this princess birthday cake, I started with making 250 drop flowers using tip #225 with #2 dot center. The flowers are made from royal icing with a touch of red food coloring. After I piped the flowers onto parchment paper, I made my own fondant using my fondant recipe. I substituted the water with sour cherry juice that I had from defrosting cherries and ended up with a nice pink color. The fondant is best when it has rested in a fridge for 24 hours, so I recommend making it a day before you use it.
Once I had the essential princess cake decorations prepared I was ready to bake the cake itself. For this birthday cake I used my easy cake recipe and added red currants to the batter. In order to have no problems with unmolding the cake, you need to smear the cake pan with shortening and flower thoroughly. Do not use oil or butter since the sides may burn, making it difficult to unmold. I baked the cake in a Wilton princess cake pan. Since the cake pan is high, it might burn on the top if you don't cover it with aluminum foil after around 40 minutes of baking. I would not recommend placing the cake lower in the oven since then the bottom might burn, making it difficult to unmold. I baked the cake for 20 minutes more and took it out once the cake tester came out clean.
I would try to make the syrup sweet-sour in order to have a contrast with the extremely sweet fondant. You can adjust the sugar amount to your taste. Once you made your princess cake wet with the syrup, cool it off completely before you decorate it. When the cake has cooled off, you are ready to decorate it. I suggest smearing the cake with a thin layer of red currant jelly or cranberry jelly instead of buttercream. That way you can keep the cake outside without having to refrigerate it. Since this cake is relatively high, it takes plenty of space in most refrigerators, making it difficult to store. If you skip the buttercream, you won’t have to worry about it. Now comes the scary part, which by the way is not. You need to roll the fondant into a circle about 4 millimeters thick, lift it with both hands and transfer onto the cake. The fondant will drape the cake beautifully leaving you to correct the folds and cutting the excess from the bottom. From the rest of the fondant you will need to make the dress bodice. Before you do that, I strongly suggest doing the doll’s hair first. Once you have the doll ready, place it into the cake and you are ready to decorate. Make one recipe of royal icing and transfer it to a piping bag with #1 tip. Before piping, make sure that the consistency of the icing is thick enough. Start with attaching the flowers to the sleeves and then at the bottom of the bodice. Add the pearl trim to the top of the bodice by piping small dots next to each other. Pipe the pearl necklace. Pipe the vines on the dress and place a flower in the middle. I suggest using tweezers if your hands are not 100% steady. To make the garlands, you will have to mark each peak with a small hole using a toothpick. I also used the toothpick to measure the distance between each garland peak. I suggest measuring one garland in the middle front of dress. Measure one toothpick distance to the right and one to the left of the middle garland to make sure that the front of the dress is exactly even. Once you marked all the peaks, you will need to mark the bottoms to orient yourself while piping. You will need 5 dots in the middle of each garland, marking the depth of each curve. After marking the garland’s distances, make sure that your icing consistency is good, change the tip on your piping bag to #2 and carefully start making the garlands. I would start at the back to practice and then slowly move to the front. Make the dot garlands at the end and attach the rest of the flowers at the hem of the dress. If you like you can make candle stands with royal icing. Just use any star tip and pipe a larger star, stick a cake candle in the middle and let it dry. Make as many as you need. You can then place the candles around the princess and your beloved one can blow them out. I hope that my instructions helped a little and that you will have fun baking and decorating your princess cake.
Return from Princess Cake to Kids Birthday Cake Recipes
Return from Princess Birthday Cake to Easy Cake Recipes Homepage
|

Custom Search
Top 5 recommended recipes
for November
If you are looking to try out some Christmas recipes then take a look at this wonderful Yule log.
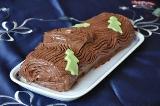
Yule Log Recipe
Now is the time to make your own mincemeat since it takes 3 to 4 weeks to mature.
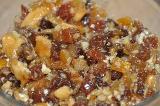
Mincemeat Recipe
Start making Christmas cookies early on! Try these gingerbread cookies which are one of my favorites.

Gingerbread Cookies
There is nothing better than a warm apple strudel served with vanilla sauce on a cold and foggy November day!
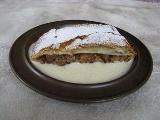
Apple Strudel
For those with overflow of apples my Polish “szarlotka” – apple cake – is just the right solution.
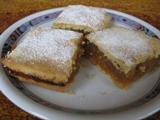
Apple Cake Recipe
Here is what one happy surfer
from Canada wrote:"I was very
happy to find your website. My
mother is Polish so I was very
happy to find some of your
recipes especially the poppy
seed strudel. My mother no
longer remembers how to make
it so now I can make it for her.
Thank you very much. Jan"


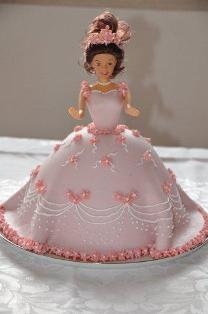 I used pretty simple princess cake decorations, made a rather easy dress when compared to what some other people do. I have to add one warning, though, the garlands were not easy to do and
 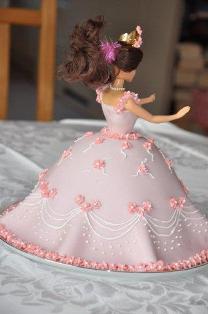 After unmolding the cake I poured syrup onto it made from 1 cup of red currant juice and five tablespoons of sugar. If you don’t have red currant juice, you can substitute it with sour cherries or just water mixed with lemon juice and sugar.
